Showing posts with label sculpture. Show all posts

Thursday, August 11, 2011

New Photo Technique

Aquamarine Sea Glass
I've been using a new photo technique I thought I'd share with you. I got the idea from this very useful (and short) video by Bryan Peterson, but I didn't want to run out and spend four or five hundred dollars on flashes and wireless. So, as usual, I cobbled together my own version.
 I built a box of foamcore, put 4 lamps in it with Ott Lite (daylight spectrum) bulbs, and topped it with a piece of white acrylic (the kind used for making signs).
I line up my subjects on the acrylic, and voila, no shadows, and lovely backlighting on the sea glass.
For your entertainment (as opposed to edification), here is the full setup. My flat files are in the center of the room, and I put my tripod on top so I could get farther away from the lightbox. I put a piece of plywood on top of the flat files so I don't dent them when I stand there. It isn't elegant, and my "studio" is packed to the gills and will never be featured in any magazine, but I get a LOT of exercise jumping up and down from this contraption!
Olive Green Sea Glass
 Pretty, ain't they?

Friday, April 23, 2010

Nice People


P4060026, originally uploaded by quercus design.
This photo is the only way I can think of to give a Nice People Award to the online shop I bought the molding from for Father Time. I sent a very crabby email about the missing molding and got a super nice note of apology back with an offer to send a different molding with no shipping charge. Well, you can't get fairer than that! So I decided that the molding I had gotten as a test would probably work and asked for 3 pieces of it, which they just emailed me they are sending at no charge!
Oh, I am so ashamed of my crabbiness. Maybe things will start looking up for me and old F.T.

Wednesday, April 21, 2010

Jinxed

Honestly, I think Father Time and I are under some sort of curse. My dollhouse molding order finally arrived, and .... ta da, NO molding! They must be out. Awaiting a response to my cranky note...

Trying hard to look on the bright side, the doorknobs are really nice.

Tuesday, April 13, 2010

Frustration

I really hate the way projects drag out at the very end, with little niggling details that are tedious and time-consuming to wrap up. If you leave the loose threads hanging, though, not only does the project look like crap, you're liable to unravel the seam. So to speak. And they are never simple to resolve - that's why they are still dangling!

I'm still trying to finish Father Time. Desperately trying. I've decided to replace the molding. Maybe I'm obsessive, but that's what makes me so special, right? And as long as I'm replacing it, I'm going to use dollhouse molding. I'm ordering this:
and plenty of it, for when I screw up! I'm also ordering some of this:
just in case the first one doesn't look right. I really hate this, it's almost as bad as shopping for pants online. How do you know they'll fit if you can't try them on?! But the alternative is to wait for our next trip off island (actually this weekend) and drag my husband and children to a miniatures store. I think I'll risk the blind shopping!

After ransacking my stashes and several hours of online hunting, I've given up on finding the right feet for the cabinet. I'm tempted to give up on feet entirely, but instinct says they are required, and instinct was right about the door. I hate it when instinct is right because it always means more work for me. In this case, I will have to fabricate them. I wanted old brass in an hourglass shape, but have no machinist skills, which leaves wood and sculpey. I'll start with Sculpey and keep you posted.

Monday, April 12, 2010

Father Time Review

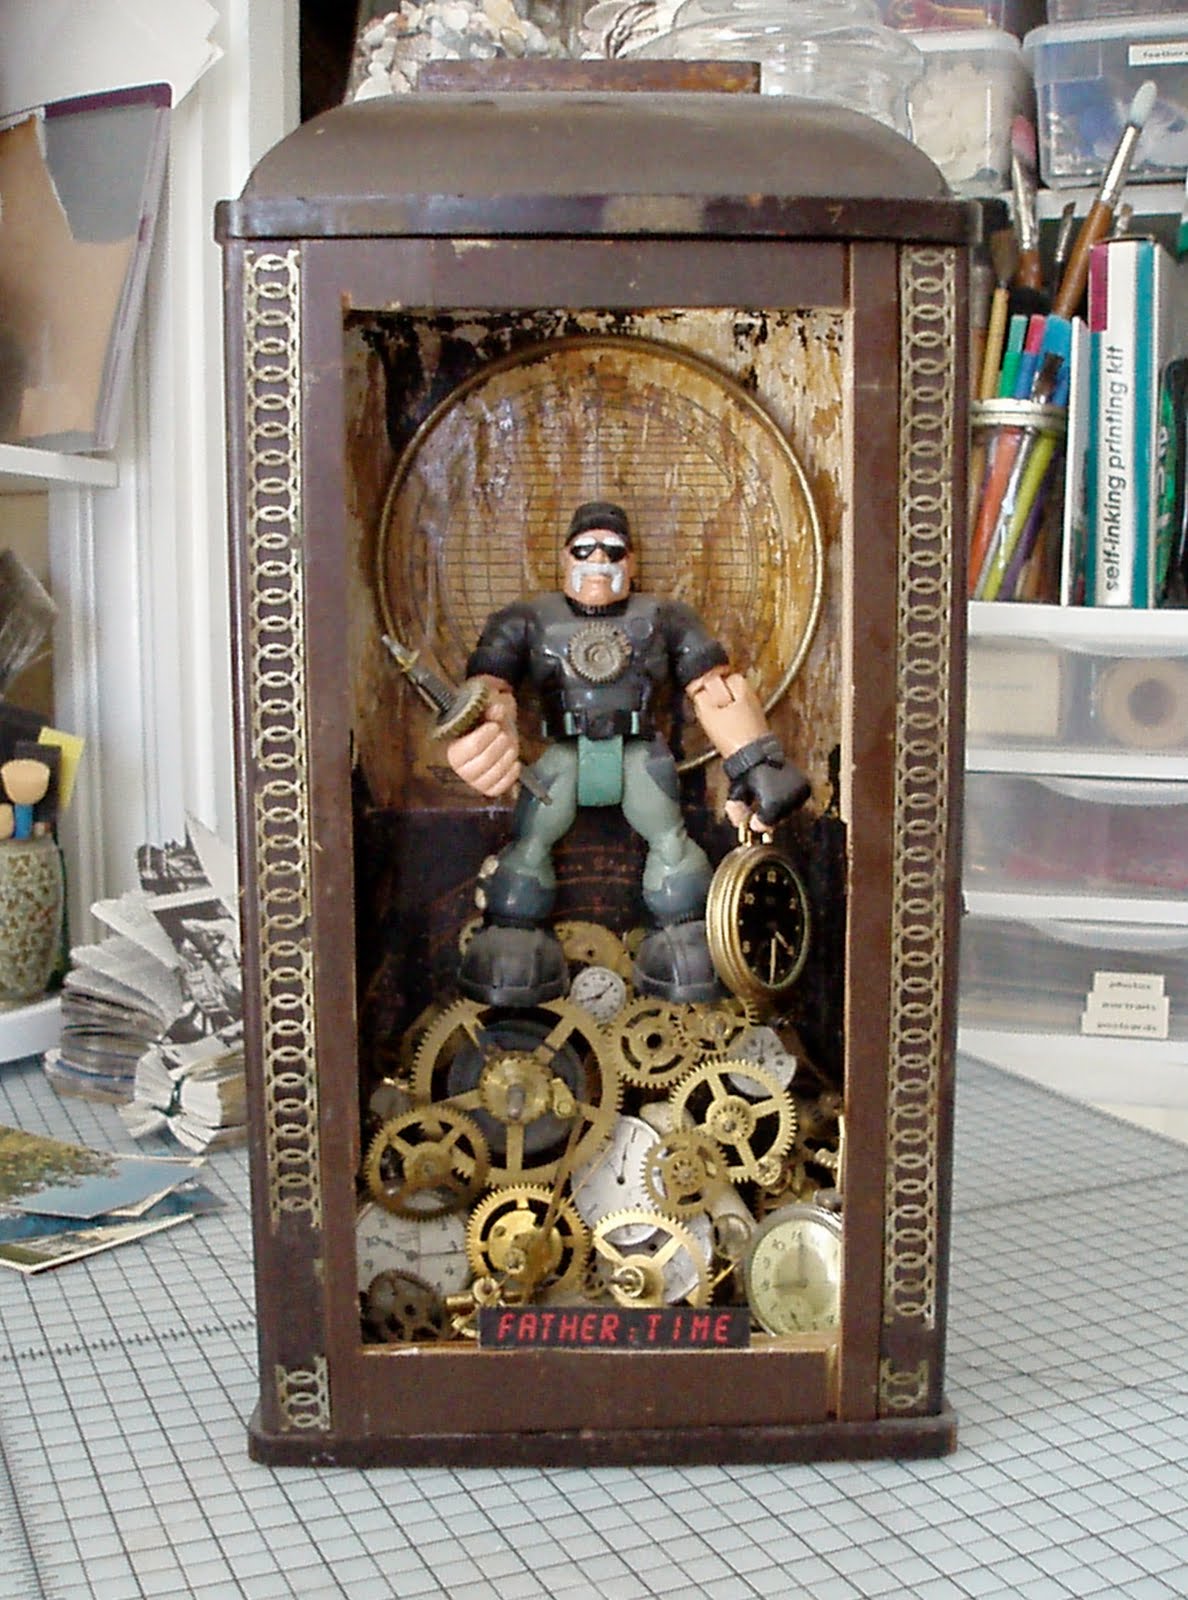
So to recap the adventures of the last week, here's Father Time in 2008, when I "finished"* the interior:

And here he is on Monday with the (glassless) door leaning in place:
And on Saturday, with the door "finished" and properly hung:
Hmm. I had intended to make a sarcastic remark about sweating the small stuff and what a minor difference all that work made, but seeing it side-by-side like this, well, maybe I'm not insane after all. It really does look better with the door than without**, and the door looks far better neatly trimmed.

Well isn't that special?

*'Finished' should always be in quotes because I rarely finish, I just run out of steam.
**Although you can't see the interior geometry as well as you could before ...

Saturday, April 10, 2010

Still Working on Time

Our last post was something of a cliffhanger, with our hero, Father Time, on the verge of being finished after years of work and procrastination, stymied at the last moment by the lack of four very small screws.
 
The hardware store did not have screws this small, but the owner dug through everything he had to me find me a package of hinges that came with similar screws. As you can see, they were a little smaller, but because they were straight where the old ones tapered, they grabbed the wood just enough to work.
The moment of truth:
Then some more touch up, this time super-gluing a loose clock face:
And ta da:
The door, it has been hung!
Now if I can just get over the 1/8" lopsided top of the frame.... Sigh. I have this sneaking suspicion that I will have to fix it. Nobody else really notices it, but it is all I can look at!
And I still haven't figured out how to fabricate his sign...
And the cabinet needs feet....
If only I had some brass pieces shaped like squat hourglasses, about 3/4" tall ... if you know where to find some I will kiss you, I will.

Oh, and of course when I went hunting through my metal bits for possible feet, I found the missing screws.

Friday, April 9, 2010

Father Time: The Door Saga

This post has been substantially edited to remove the worst of the whining.

The amount of work it takes to make something look simple never fails to amaze me. Like a pirouette or a curve ball, things that look effortless and inevitable require hours and hours of complex preparation. In my case, completing the door (and only the door) of one assemblage.
 Father Time is housed in an old clock case that was missing its decorative finials. I was reluctant to use a clock case because Father Time in a clock equals boring. On the other hand, the proportions suited him. So I turned it upside down.
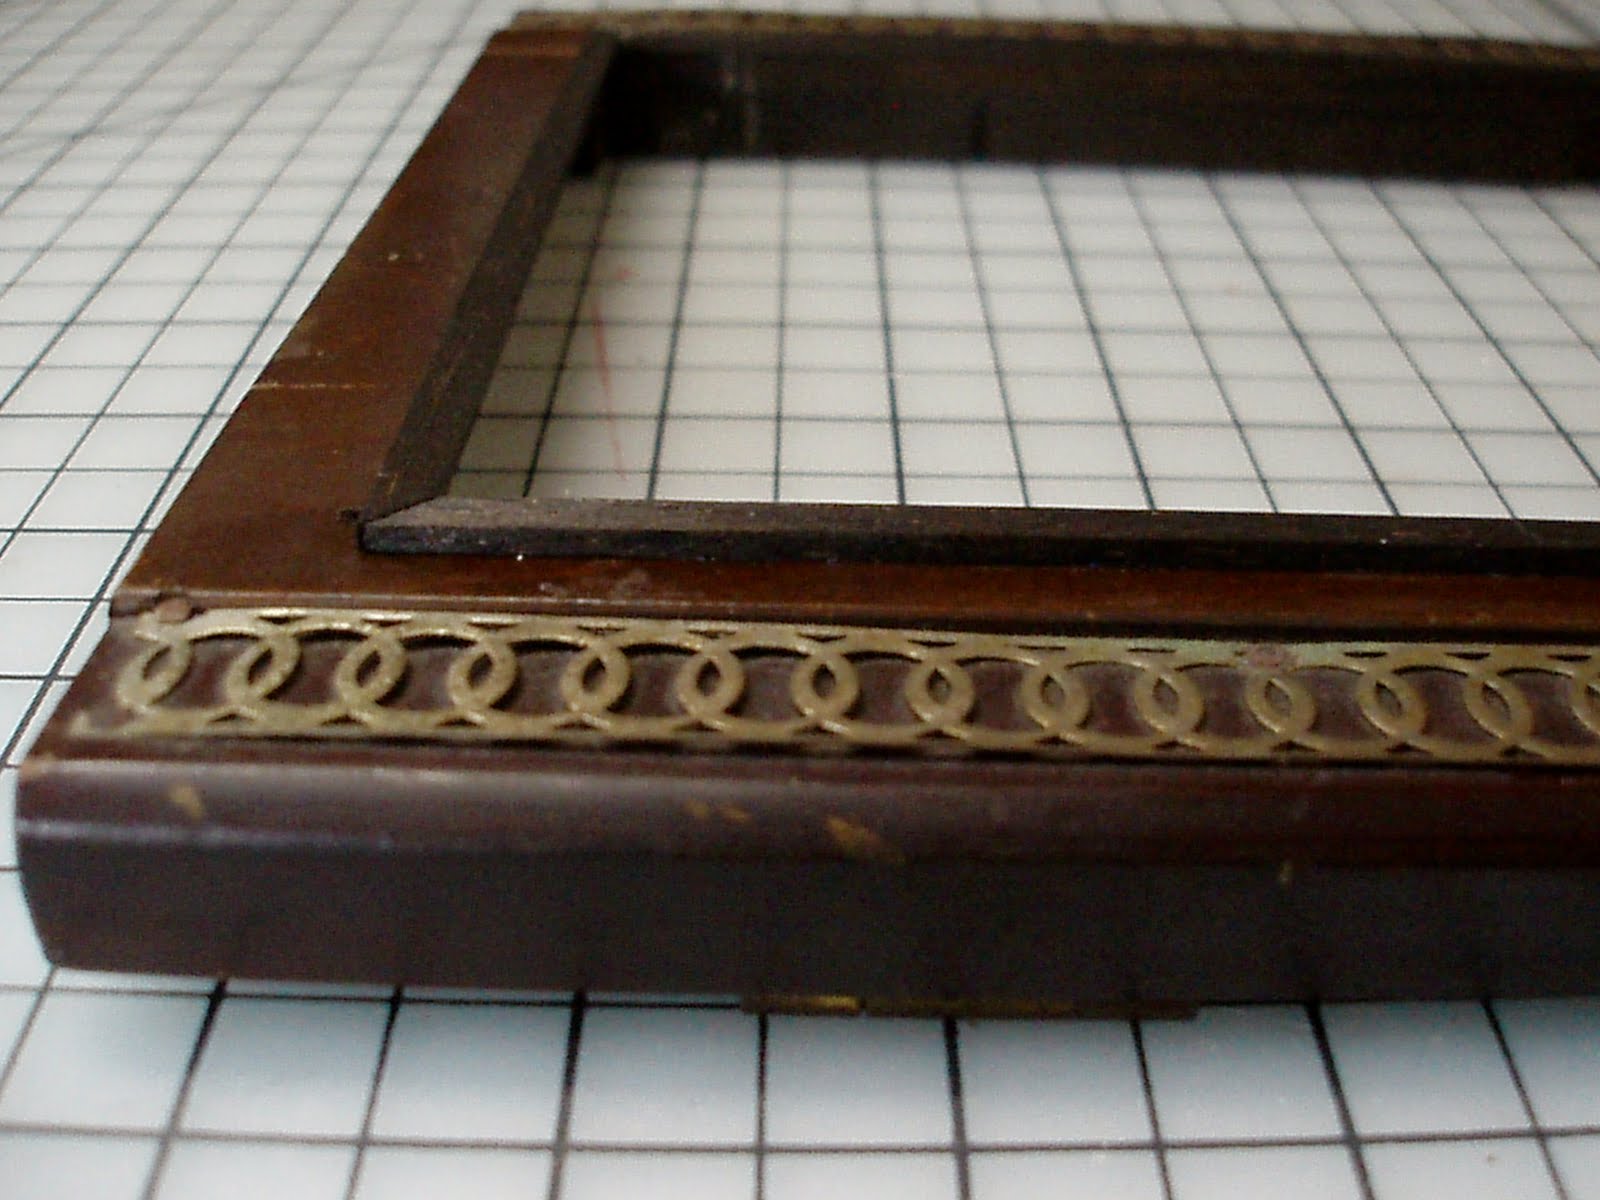
Still obviously a former clock, and awkwardly divided to boot. Since the hinges are mortised, flipping the door was beyond my skill and would have left the old mortised areas exposed. But I wanted the door to match the case, and that aged brass trim worked well with the circular theme developing on the interior.
This was the best I could do with my little jewelry saw.* So I asked my darling husband, who is good with power tools, to make the opening into a rectangle. Unfortunately his tools were not dainty enough for this scale, and the door got kinda mangled.
And there it sat for about 2 years until I finally made up my mind that the door absolutely positively had to be completed this week.

Monday
Took the door shopping. We hit the stores looking for thin moldings. (I live on an island off midcoast Maine, so this involved more mileage than it might for some.) Struck out at the local hardware store and frame store, so I hit the hardware stores, Home Depot, and hobby store on the mainland. Nope nope nope. Every additional store I had to visit got me that much more frustrated and impatient. I just wanted it done. Prowling the hobby store in desperation, I found strips of balsa wood. 3/16" x 1/8" looked just wide enough to cover the irregular edges with a little lip to hold the glass. And a 1/8" square piece to sit on the inside holding the glass and covering the edges. Bought 2 sticks of each, went home. Also attempted to find materials for Jack Frost, but that's a headache for a separate post.
Wednesday
Burnished the balsa bits and the raw edges of the door with a thick coat of Minwax Dark Walnut 2716 and waited about 36 hours for it to dry. That kicked off the next set of problem-solving.

1. Streaks in the wood refused to take the stain. Finally filled them with a black fine-point Sharpie.
2. While mitering the corners, discovered that a dull knife will crush balsa. Re-did the corners.
3. Not enough of a lip to hold the glass, so had to shorten the sides, redoing the corners again.
4. Portions would not touch the frame because of the uneven surface. The glass and inner molding will have to suffice as structural support for those areas. Finally glued down the basic outer frame with my old friend Elmers.
 Not too bad, when you step back and don't look with too critical an eye. Left it to dry overnight.
Today
 Flipped the frame over and slid the glass into place, instantly re-entering problem-solving mode...
5. as one piece of balsa promptly popped off the short end. Ignored it. Secured the corners of the glass to the frame using my other old friend, Super Glue. Cut and glued the first piece of the inner molding (to the glass and to the wood frame).  
6. The inner frame is visible from the outside because the outer frame sits farther back than anticipated (in order to cover the irregular edge).
Continued gluing the inner frame, figuring that I had to redo the outer frame later anyway. All went reasonably well, with only a few interruptions and setbacks (like edges so irregular I had to carve the balsa to fit) until I 'finished' the interior and flipped it over.
7. The outer balsa had shifted, so the superglued glass and inner balsa were now sticking out beyond the edge of the frame. Swearing, I flipped it back over, slid the blade of my knife between the inside of the frame and the glass/balsa in the problem area, held my breath and pressed gently to pop it back in. Then applied super glue from the back (the inside of the door). Worked well enough. My standards sink as my frustration rises.
8. Pried the balsa off the front and tried to realign it. Had to cut a new piece for one side.
9. Got it all glued up neatly, looking pretty good ... until I realized the top balsa piece was about 1/8" off horizontal.
Left it for now. If I decide I can't stand it, I will have to pry off at least 2 sides (assuming I do no damage to the others in the process) and cut a new, 1/8" longer piece for the long side. Which means another trip off-island to the craft store, since all those other mistakes ran through my supply of balsa.
A final stain touch-up of areas where raw wood showed, a final dusting of the interior, and it was time to hang the door! I was beside myself with anticipation until I unfolded the hinges...
10. I have no idea where I put the screws when I took the case apart two years ago.

It's 5:45 and the hardware store closed half an hour ago. Screeching halt and a nasty case of Projectus Interruptus.

Tuesday, March 30, 2010

Jack Frost progress

A reader asked how I work out ideas. Here's my thought process. I imagine it will amuse you.
The last time we saw Jack Frost, he was leaning against a rejected container, surrounded by tracing paper sketches of possible containers.  OK, making a six-sided crystal out of glass. Got the rough dimensions. Must make a mock-up to test them.  Dig out chipboard (thin, like what cracker boxes are made of), craft knife (I don't like this one but my good Olfa got was appropriated for the bathroom renovation), metal ruler and scotch tape.  This has to be precise, or I won't be able to judge. And I can use these as templates for cutting the glass. How am I going to miter the glass edges? And what kind of glue? Ack, must focus. First things first...
Very neatly cut out six sides and a base. Assemble three sides and base with tape.
Insert Jack.  ...    Contemplate.
Oops. He won't be standing on the bare base! And the base will be wood, so it'll have thickness. Maybe an inch? Let's see, something to bulk up the base...  
Doesn't everyone have a small anvil lying around?
 
Okaaay, what do I think of this? Is that too much space over his head? How tall do I want it to be? Will the walls come down around the base or sit on top of it?  
Ponder.
Down around, I think, so it's more crystal-ish, in which case we need to trim down the base to fit inside the walls.  Scribble note to revise dimensions onto base. Cut second hexagon for top. Tape in place. Contemplate. Get frustrated by construction. Go eat lunch.
Hmmm. That looks about right. Seems like there's room to pose him. One hand touching the glass and frost patterns forming there.... but not too much 'blank' space behind him.... Now how to mount that top? Inside the walls or on top of them? Inside would be more crystal-y, but then there'd be no way to access the interior once it got glued shut. The glass could sit on the base like a display dome, but then I couldn't have any loose 'snow'....
Argh, how the hell can I assemble this?! Why do I always think up stuff I can't build? Why don't I just stick to collage!? I'm really good with glue..."  
Go find a snack. Google "glass glue." Check eBay. Look at Flickr. Read some blogs. See if anyone's commented on mine. Contemplate exercising. Decide to focus instead.


Yeah, OK, I think it's the right size. What next? Someone to cut the glass. Hardware store. Frame store? Can the frame store bevel it? I'll check them first. If they can't, I'll take it to the hardware...oh wait, isn't there a glass store in Ellsworth? Half hour drive. Ugh. Frame store first then. Tomorrow. But I haven't figured out the issue with the top! Should it be hinged? How the hell am I gonna hinge glass?! Epoxy hinges on? Do I really need the snow to be loose? Wouldn't it be so much simpler if the whole thing could sit over the wooden base? Hinges would look awful. Totally non-crystal.

Ugh, let Jack sit for a bit. He's fried my brain.
Meanwhile, Poor old Father Time is all dusty. Let's see what he looks like with his door. Ooh, I like that. But I've got to get some molding or something to finish off that rough edge where Brian cut the old window bigger for me. And what can I use to make his sign? Plexi? And how to mount the glass in the window?
Hmm, part of the door has a channel, part doesn't. Maybe if the molding is sort of L-shaped, I can put the glass under it? But how will that look if it sticks up on the front of the door? Argh, why is everything so complicated! And these broken metal bits on the front need to be glued down. Where's my SuperGlue? Oh crap, there's the school bus!
End of coherent thought for the rest of the day.

Saturday, March 27, 2010

Works In Progress


This is what I am working on now. Jack Frost is on the left and Father Time is on the right. They're part of a series I'm doing, called the Pantheon.

FT is almost done. I need to work on the door to his case. He's been like this for about a year. I'm terrible at the last finishing details. For some reason once the basic concept is fleshed out I have to force myself to focus on the last (but crucial) bits. So of course right now I'm concentrating on Jack!


This is Jack. He's an old Ken doll painted with layers of white, silver, and pearl acrylics. His hair and beard are made of glitter and fake snow. I painted over his eyes and then scraped it gently to show the original blue. I can't remember if I used gesso as a base layer. I find that the thicker acrylics (from a tube, mostly) work very well on plastic toys if they aren't meant to be handled. Sculpture yes, playtime, no.


He's been sitting around for ages waiting for a container. Mostly he's been hanging out in that apothecary jar you can see peeking out behind the tracing paper. It was the only one I could find (and afford) that seemed large enough. It was too narrow, but I was stumped and left him in it. Finally last week I decided that I couldn't stand all this unfinished stuff. He needs to be inside an ice crystal. They are six-sided and symmetrical. So how do I build one? This is the beginning of a mock-up. I'm working out dimensions on tracing paper. Next I'll make a full-size model in chipboard to make sure it's the right size, and I'll use those pieces as templates for the glass.

The base will be wood, probably cut to fit snug inside the crystal and painted silvery white like Jack. I have plans for snow inside, frost patterns climbing up the glass .... that's the fun stuff! Also tricky. But first I have to make the case.

At the moment, I plan to have the local hardware store cut the glass for me, then use UV-cured glass glue to put it all together. Because I want it to look like a crystal, the edges have to be uniform with the rest of it - can't use stained glass techniques. According to my research (God bless Google) the UV glue is the only one that will hold and not yellow over time. And fortunately I have access to a UV light! (My father-in-law is a retired dentist.) However, I am still waffling about the edges. If this was wood, I'd miter them for a neat fit. Mitering glass is beyond my skill. I'll see if the hardware store can bevel them. Even if they don't make a perfect mitered joint, the gap will be on the inside and less visible. But will the resulting edge be wide enough to hold the glue? Stay tuned!


Tuesday, March 9, 2010

Mommy Can I Keep It?


Mommy Can I Keep It?, originally uploaded by quercus design.

Oops, forgot to post yesterday. It's hard to develop a habit, isn't it? Once the first flush of excitement and awareness wear off, it just slips out of mind so easily.

I thought I'd give a better shot of the sculpture I use as my avatar. It's called "Mommy Can I Keep It?" Ingredients from top to bottom: old mayonnaise jar, vintage 'pearls' from my grandma's necklace, wasp nest, vintage doll, pheasant feathers from my sister's stash, sweet gum seed pods, abandoned bird nest with empty eggs from my Mom.